Contact Us

Use the form on the right to contact us.

You can edit the text in this area, and change where the contact form on the right submits to, by entering edit mode using the modes on the bottom right. 

2210 Haines Avenue
Rapid City, SD, 57701
United States

605-341-5044

Someone's In the Kitchen is an independent, gourmet kitchenware store in Rapid City, South Dakota. We are your shop for "all things kitchen". Enjoy a leisurely shopping experience in the world of kitchen and home.

RECIPE ARCHIVE IV

Filtering by Tag: flour

Mediterranean Party Platter

Lia Soneson

 
Mediterranean-Party-Platter_V2_01.jpg

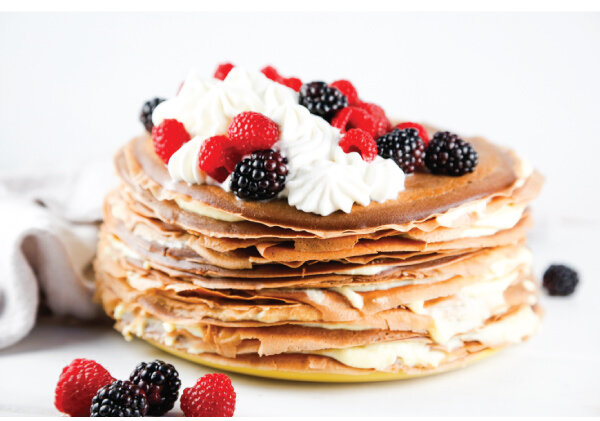
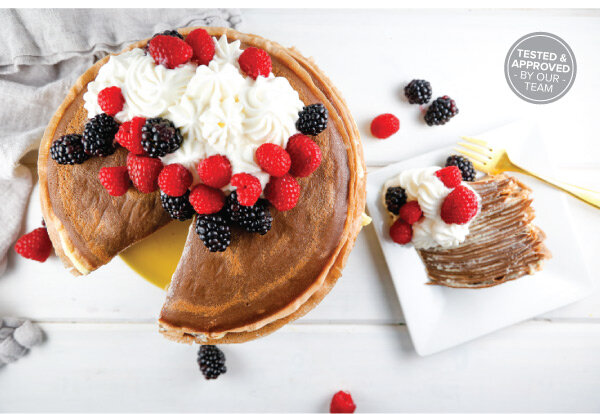
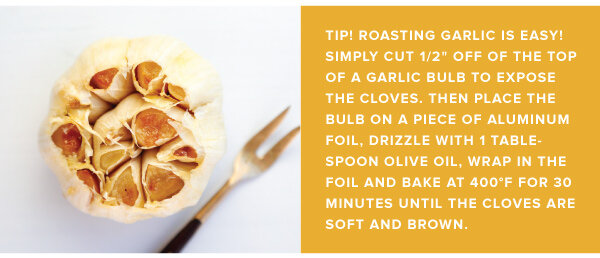
This Mediterranean party platter is all you need for a delightful dining experience, al fresco, this summer. Try our fail-proof tip for the creamiest hummus that features an extra flavor boost from roasted garlic cloves and sesame oil. Add homemade grilled pita bread and fresh veggies for a very tasty, shared summertime table.

Mediterranean Party Platter

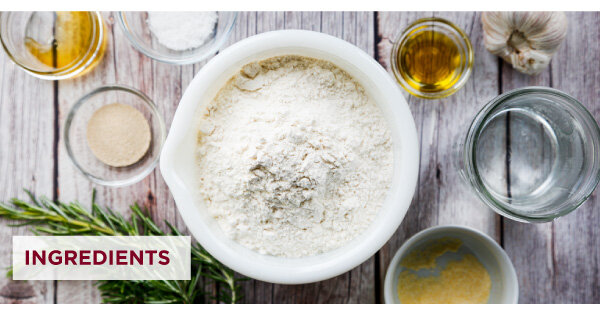
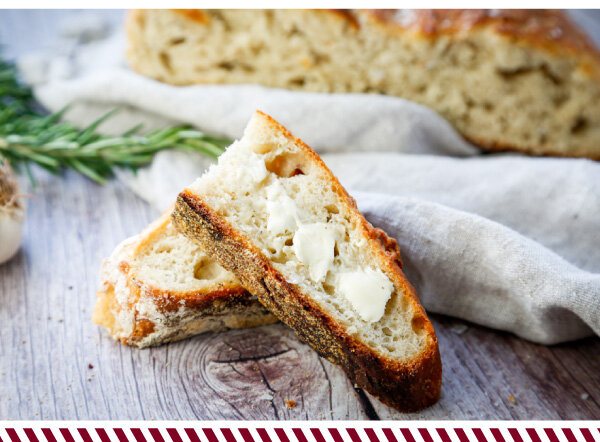
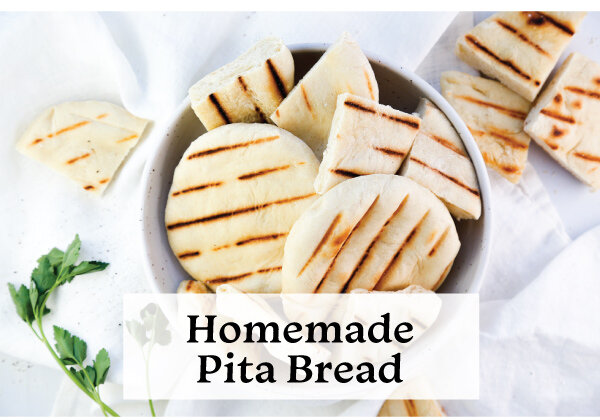
Homemade Pita Bread:
1 cup warm water
1 packet active yeast, or 2-1/4 teaspoons
2-1/2 to 3 cups flour
1 teaspoon Kosher salt
1/2 teaspoon sugar
2 tablespoons olive oil, plus extra for oiling bowl
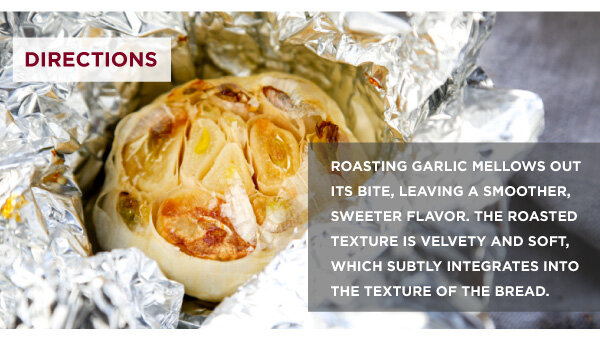
Directions:
1. In the bowl of a stand mixer, pour in the warm water and sprinkle the yeast on top. Allow the yeast to hydrate and bloom by leaving undisturbed for 2-3 minutes.

2. Add one cup of flour and the sugar to the yeast and water. Mix on low speed with the paddle attachment for about 1 minute or until evenly combined. Let the beginning batter stand for about 20 minutes for further yeast development.

3. After this rest, many bubbles will have formed. Add the salt and olive oil to the batter. On low speed, slowly add an additional 1-1/2 cups of the flour.

4. Continue to mix and add 2-4 tablespoons of additional flour until a soft dough ball has formed. The dough should be "springy," and not too sticky.

5. Remove the dough from the mixer and knead on a lightly floured surface until the dough forms a nice, well-rounded ball.

6. Clean the mixing bowl, then drizzle a little olive oil and coat the inside of the bowl. Place the dough into the bowl, turn it to coat all surfaces with the olive oil. Cover, and let rise for 2 hours or until doubled in size.

7. Remove the risen dough from the bowl, and pat into a flat disk. Divide the disk into 8 equal sections with a dough cutter or large chef's knife.

8. Form each section into its own small ball by folding the dough until a neat ball has been formed.

9. Place the 8 individual balls on a lightly floured surface and cover with plastic wrap for 30 minutes and let rise again.

10. Once the individual dough balls have risen, remove a single ball and gently roll into a 8” circle, or until the dough is about 1/4” thick.

11. Preheat a well-oiled cast-iron grill pan on the stovetop over medium-high heat.

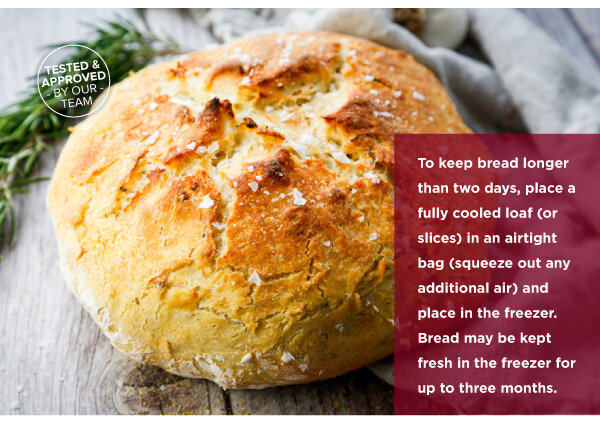
12. Place the rolled out dough pieces in the heated pan, and watch it puff up. Turn until each side is slightly golden, about 3 minutes per side. Cut into wedges and serve with roasted garlic hummus.

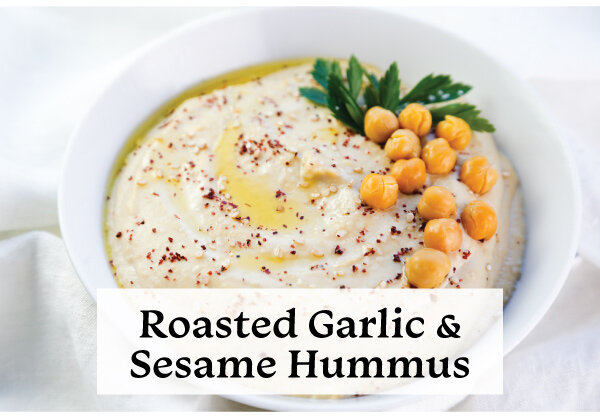
Roasted Garlic and Sesame Hummus:
1 can (15 oz) chickpeas, rinsed and drained
3/4 teaspoon baking soda
1/4 cup, plus 1 tablespoon fresh lemon juice (about 1 large lemon)
1/4 cup, olive oil
1/2 cup tahini
1/2 teaspoon Kosher salt
1/2 teaspoon toasted sesame oil
1 small clove fresh garlic, finely minced
5 cloves roasted garlic

Garnish:
Sumac
Toasted Sesame seeds
Fresh parsley, chopped
Olive oil, for drizzling

Directions:
1. In a medium pot, add the chickpeas and baking soda. Cover the chickpeas with an 2-3 inches of water and cook over high heat, bringing the water to a rolling boil. Slightly reduce the heat and keep the chickpeas cooking over a low boil for 20-30 minutes until they are very soft and their skins are falling off. Strain and rinse chickpeas in cold water, shifting and turning them to risen off any baking soda residue. Continue to rinse under cold water until chickpeas are back to room temperature.

2. In a large food processor blend the cooked chickpeas until smooth.

3. Drizzle in the lemon juice, olive oil, tahini, Kosher salt, sesame oil, garlic, and roasted garlic. Blend until smooth, scraping down the sides as needed.

4. Garnish sumac, toasted sesame seeds, fresh parsley, and a healthy splash of olive oil. Serve with pita bread, olives, cucumbers, tomatoes, peppers, snap peas, and marinated feta cheese. Store leftover hummus in an airtight container in the refrigerator for up to 5 days.


Chocolate Crêpe Cake

Lia Soneson

 
Chocolate-Crepe-Cake_V2_01a.jpg

We love the beautiful, layered presentation of a crêpe cake, and we love the flavor even more! Alternating layers of chocolate crêpe and vanilla custard stack together in an extremely impressive assembly. This not-too-sweet 'cake' is topped with fresh berries and whipped cream, and pairs perfectly with a cup of coffee. The only question is whether to serve it for breakfast for dessert. You decide! (Hint: we suggest both!)

Chocolate Crêpe Cake
Makes one 8-inch cake - Serves 8-10

Chocolate Crêpe Ingredients:
Makes about 30 (8-inch) crepes
12 eggs
5 cups whole milk
1/2 teaspoon Kosher salt
2/3 cup unsweetened cocoa powder
2/3 cup sugar
1 tablespoon vanilla extract
1 cup butter, melted
3 cups flour Canola oil for coating the cooking surface

Vanilla Custard Filling Ingredients:
Makes about 6 cups
2 cups whole milk
1 cup heavy cream
3 large eggs
3 large yolks
3/4 cup sugar
1/4 teaspoon Kosher salt
3 tablespoons cornstarch
1/2 tablespoon pure vanilla extract
6 tablespoons unsalted butter, cut into 1/2-inch cubes

Whipped Cream Topping Ingredients:
1 cup heavy whipping cream
1/4 cup powdered sugar
1 teaspoon vanilla extract

Garnishes:
Additional cocoa powder for dusting
Fresh raspberries
Fresh blackberries

Directions for Making the Crepes:
1. Prepare the crêpe batter: In a food processor or blender, mix the eggs, milk, Kosher salt, cocoa powder, sugar, and vanilla extract together. Blend thoroughly. Add the melted butter and blend again. Add the flour to the mixture and mix until just combined; do not over mix. The batter should be the consistency of heavy cream.

2. Allow the batter to sit for several hours or overnight in the refrigerator. This chilled resting period is key to forming a good batter.

3. When it’s time to make the crêpes, prepare a landing place for the finished crêpes by lining a plate with a layer of parchment paper. Prepare several pieces of parchment paper to place between the cooked crêpes.

4. Heat a crêpe pan or nonstick skillet over medium heat. Swipe the cooking surface with a canola oil-soaked paper towel. Pour 1/3 cup batter on to the hot skillet and immediately swirl the batter to coat the surface. The batter will quickly set and the top will become dry looking with little bubbles forming. Once you're able to loosen the edges of the crêpe and check the bottom for golden brownness; about 1-2 minutes, flip the crêpe and cook the other side for another 30 seconds - 1 minute. Remove the finished crêpe from the pan and place on a waiting plate. Repeat until all of the batter has been used, about 25-30 crêpes (not a thousand!).

5. Allow the crêpes to cool. Wrap the entire stack well, once cooled, to prevent drying out and to prevent odors from invading the flavor of the crêpes until ready to assemble the cake.

Directions for Making the Vanilla Custard:
1. In a large saucepan, heat the milk to scalding.

2. In a large bowl, whisk together the cream, eggs, egg yolks, sugar, salt, and cornstarch until smooth. If necessary, strain through a fine sieve. Stream in 1/2-cup of the hot milk while stirring continuously. Gradually add the remaining hot milk continuing to stir constantly. (This process, known as “tempering,” gradually increases the temperature of the mixture without curdling the eggs and egg yolks.)

3. Pour the mixture back into the same large saucepan used to heat the milk and cook over medium-low heat, stirring constantly until the mixture thickens to a thin custardy consistency (it will continue to thicken as it cools). Remove from the heat.

4. Add the vanilla extract and cubes of butter. Stir until the butter is melted and combined into the mixture. Set the mixture aside to cool to room temperature. Place a piece of plastic wrap on the surface of the pastry cream to prevent the formation of a “skin.” Store in the refrigerator until ready to assemble the crêpe cake.

Directions for Assembling and Finishing the Crêpe Cake:
1. Smear a teaspoon of the vanilla custard filling in a circle on the bottom of the presentation plate. This will help to steady the final stack of crêpes.

2. Place a crêpe, centered, on the plate. Spread about 2-3 tablespoons of the vanilla filling on top and spread in a thin, even layer. Repeat the sequence of alternating layers until all the crêpes are stacked finishing with a crêpe.

3. Wrap the cake well to prevent drying out and to deter any odors in the refrigerator transferring to the dessert. Chill the assembled cake for 4 hours or overnight.

4. Just prior to serving, whisk the heavy whipping cream, powdered sugar, and vanilla extract, until the sugar is dissolved. Whip the mixture to stiff peaks. Use a piping bag and star tip, pipe the whipped cream on top of the gâteau in an interesting design of your choice. Garnish with fresh berries.

5. To serve, cut narrow wedges of the crêpe cake with a long knife. Lay each slice on its side on an individual dessert plate to display the thin layers. Serve with extra whipped cream and berries.


Manchego and Thyme Popovers

Lia Soneson

 
Popovers_v2_01.jpg

Popovers are impressive, high-rising rolls with a soft, airy inside and a crispy, crunchy exterior. These delectable morsels are meant to be enjoyed freshly baked straight out of the oven. IN THIS ISSUE, we feature Manchego and Thyme Popovers with an Herb Butter that would be enjoyably delicious as a savory breakfast, or as a side at lunch or dinner! 

Manchego and Thyme Popovers with Herb Butter
Makes 12 popovers

Popover Ingredients:
1-1/2 cups all purpose flour
1 teaspoon Kosher salt
1/2 teaspoon fresh ground black pepper
1 tablespoon fresh thyme, finely chopped
4 large eggs, room temperature
1-1/2 cups whole milk, room temperature
1/2 cup Manchego cheese, finely grated
2 tablespoons unsalted butter, melted (for greasing the popover pan)

Herb Butter Ingredients - makes 1/2 cup
1/2 cup (I stick) unsalted butter, softened to room temperature
1 garlic clove, minced
1 tablespoon fresh sage, finely chopped
1 tablespoon fresh rosemary, finely chopped
1/4 teaspoon Kosher saltPopover

Directions:
1. Preheat the oven to 450°F. Place the empty pan in the oven while it preheats.

2. In a medium bowl, combine the flour, salt, and pepper and mix with a fork for about 30 seconds to incorporate evenly. Add the thyme and continue mixing until evenly distributed.

3. In a large bowl, whisk the eggs and whole milk together until contents are frothy, about 5 minutes.

4. Slowly add the flour mixture to the egg mixture and continue whisking until all the ingredients are combined and the batter is the consistency of thick cream. (Try not to over whisk!) Stir in the cheese.

5. Remove the preheated popover or mun pan from the oven and brush the cups with the melted butter. Fill the cups 3/4 full with the batter. Bake the popovers on the lowest rack for 20 minutes. After 20 minutes, reduce the temperature to 350°F, ensuring the oven door stays closed so no steam escapes (this is crucial to getting the pop effect!). Continue to bake for another 20 minutes, or until golden brown.

6. Remove popovers from the oven and serve hot with herb butter. If not serving right away, remove popovers from the pan and cool on a wire rack immediately to keep that delightful crunch!

Herb Butter Directions:
1. In a small bowl, combine all of the ingredients together and mix with a fork or a hand mixer until the herbs and garlic are distributed evenly.

2. Transfer the butter onto a sheet of plastic wrap and roll into a cylinder. Twist the ends of the plastic wrap tightly and refrigerate for at least one hour until cold and solid.

3. Serve herb butter alongside warm popovers in a small dish. Butter is best when enjoyed within 1 week, but can be frozen for up to two months. To freeze, simply wrap the plastic wrapped butter in parchment paper and freeze in a freezer bag, removing excess air. Extra herb butter? Heat and drizzle butter over homemade popcorn or add to baked potatoes.


Roasted Garlic and Rosemary No-Knead Dutch Oven Bread

Lia Soneson


Bread. What’s not to love? A crunchy crust and soft, airy interior are just the beginning of our obsession. We love this recipe because it packs a serious flavor profile with minimal effort. It’s great for beginners, and takes less than three hours from start to a tasty finish. IN THIS ISSUE, we walk through the techniques of baking Dutch oven bread, and offer various success tips to inspire both novice and pro bakers alike!

Roasted Garlic and Rosemary No-Knead Dutch Oven Bread
Makes 1 loaf

Bread. What’s not to love? A crunchy crust and soft, airy interior are just the beginning of our obsession. We love this recipe because it packs a serious flavor profile with minimal effort. It’s great for beginners, and takes less than three hours from start to a tasty finish. A great recipe to inspire both novice and pro bakers alike!

Bread Ingredients:
1-1/2 teaspoon instant yeast
1-1/2 cups warm water (105° F)
1 teaspoon honey
1-1/2 teaspoon sea salt
2 tablespoons fresh rosemary, finely chopped
3 cups all purpose flour
1/2 teaspoon cornmeal
1 tablespoon olive oil, divided
1/2 teaspoon coarse/flaked sea salt

Roasted Garlic Ingredients:
1 head garlic
1 teaspoon olive oil

Directions:
1. Heat the oven to 400°F. Cut o the top of the garlic bulb to expose the cloves and place in a garlic roaster or a square of aluminum foil. Drizzle the garlic with the olive oil and cover. Or, in the case of foil, twist the corners at the top to prevent any oil drips during roasting. Roast for 30 minutes or until the cloves are soft and slightly browned. Remove from the oven and cool. Once cooled, use a small fork to remove the cloves from the head of garlic. Mash the soft cloves into a paste-like consistency.

2. Meanwhile, combine the yeast, water, and honey in a large mixing bowl. Let the mixture stand for about 5 minutes to allow the yeast to activate (the mixture should become slightly foamy.)

3. Add the mashed garlic, salt, and rosemary to the yeast mixture. Slowly add the flour to the mixing bowl in one cup increments, stirring with a wooden spoon until all the ingredients are incorporated. Do not over mix; the dough will be quite shaggy and sticky, yet will form a loose ball in the bowl.

4. Sprinkle the dough with a small amount of flour on top. Cover the bowl with a kitchen towel. Let the dough rise on the counter in a draft-free area for about 1 hour, or until it has roughly doubled in size.

5. On a lightly floured surface, with lightly floured hands, gently guide the dough into a ball. Place it back in the bowl, cover, and let the dough rise for another 30 minutes.

6. Preheat the oven to 450°F. Lightly coat the inside of an empty 5.5 qt. Dutch oven with 1/2 tablespoon of olive oil. Place the lid on the Dutch oven and put it in the middle of the oven. (Be sure to preheat the Dutch oven as the oven preheats; to avoid cracking of the pot’s enamel; never place a cold, empty Dutch oven in a hot oven.)

7. Lay a piece of parchment paper on the counter and sprinkle corn meal on the paper. Gently guide the risen dough out of the bowl and onto the parchment paper. Use the sides of the parchment paper to tip and coax the dough back into a circular form if it has lost its shape. Take care not to deflate the risen dough. Use oven mitts to remove the Dutch oven from the hot oven. Use the parchment paper to transfer the dough into the preheated Dutch oven. Brush the top with the olive oil. Use kitchen shears to cut an “X” on the top of the dough. Sprinkle the sea salt across the top.

8. Cover the bread with the Dutch oven lid. Use oven mitts to transfer the Dutch oven back into the oven. Bake for 30 minutes, until the bread is lightly browned. Remove the lid and cook for another 10 minutes, until the crust is nicely browned. The bread’s internal temperature should be between 195 - 210°F.

9. Cool on a cooling rack, then devour while warm, preferably with a healthy dose of butter and salt.


Sweet Potato Doughnut Holes

Lia Soneson


Did someone say fresh, warm, doughnut holes? IN THIS ISSUE, we feature doughnut making tips and techniques! We love making these bite-sized treats at home because we can enjoy them by the handful and not feel guilty in front of anyone. Now you can too!

Sweet Potato and Cardamom Doughnut Holes Makes about 30 doughnut holes

Did someone say fresh, warm, doughnut holes? These lovely morsels feature warm, autumn spices including allspice, cinnamon, and cardamom. And, since they are made with sweet potatoes, they’re almost healthy, right? We love making these bite-sized treats at home because we can enjoy them by the handful and not feel guilty in front of anyone. Now you can too!

Ingredients:
2-1/2 cups all-purpose flour
1/4 cup sugar
1 tablespoon baking powder
1/4 teaspoon allspice
1/4 teaspoon cardamom
3/4 teaspoon salt
5 tablespoons chilled butter
3/4 cup buttermilk
1/2 cup sweet potato, cooked and pureed (roughly 1 small sweet potato)
1/2 teaspoon vanilla
4 cups canola oil for frying

Cinnamon Sugar Topping:
1/3 cup granulated sugar (or powdered sugar)
1 teaspoon cinnamon

Directions:
1. In a large bowl, combine the flour, sugar, baking powder, allspice, cardamom, and salt. Whisk the ingredients together until evenly incorporated. Cut the butter into the flour until it resembles a crumb-like mixture.

2. Add the buttermilk, mashed sweet potato, and vanilla, Fold the dough together until all the ingredients are combined. The dough will be sticky to the touch.

3. Scoop out pieces of the dough and roll them into balls roughly 1-1/2" in diameter. Set aside.

4. in a separate, shallow dish, stir together the cinnamon and sugar. Set aside.

5. Add the oil to a medium-sized saucepan and warm the oil over medium-high heat until it reaches 350°F. Drop the doughnut holes in about 6 at a time.

6. Fry the doughnut holes, very carefully, for about 3-4 minutes, occasionally turning them in the oil to ensure all sides are getting cooked and browning evenly.

7. Use a slotted spoon, skimmer, or spider to transfer the doughnut holes to a paper towel-lined plate. After cooling the doughnuts for about 30 seconds, roll them in the cinnamon-sugar mix until they are fully covered. Enjoy immediately!


Make Your Own Summer Blueberry Hand Pies

Lia Soneson

 
Blueberry_HandPies_v1_01.jpg

SUMMER BLUEBERRIES burst with a flavor that only happens when truly in season. One of our favorite ways to celebrate these little nutritional powerhouses is to place them in hand pies. The berries’ diminutive size fit neatly into petite packets, which highlight the rich cream cheese-based crust — a truly mouth-watering match!


Fresh Cream Puffs with Berry Filling

Lia Soneson

 
Cream_Puffs_v3_01.jpg
Expanding your repertoire of kitchen skills these days? Add cream puffs to your list of culinary mastery while celebrating the return of fresh berries. The light, delicate, cream puffs with sweet berry filling are perfect for Mother’s Day, too! This recipe starts with a classic French pâte à choux and finishes things off with bright, jammy berries, and homemade whipped cream.